How to Upgrade to Office 2016 or Higher
Why you should upgrade Office
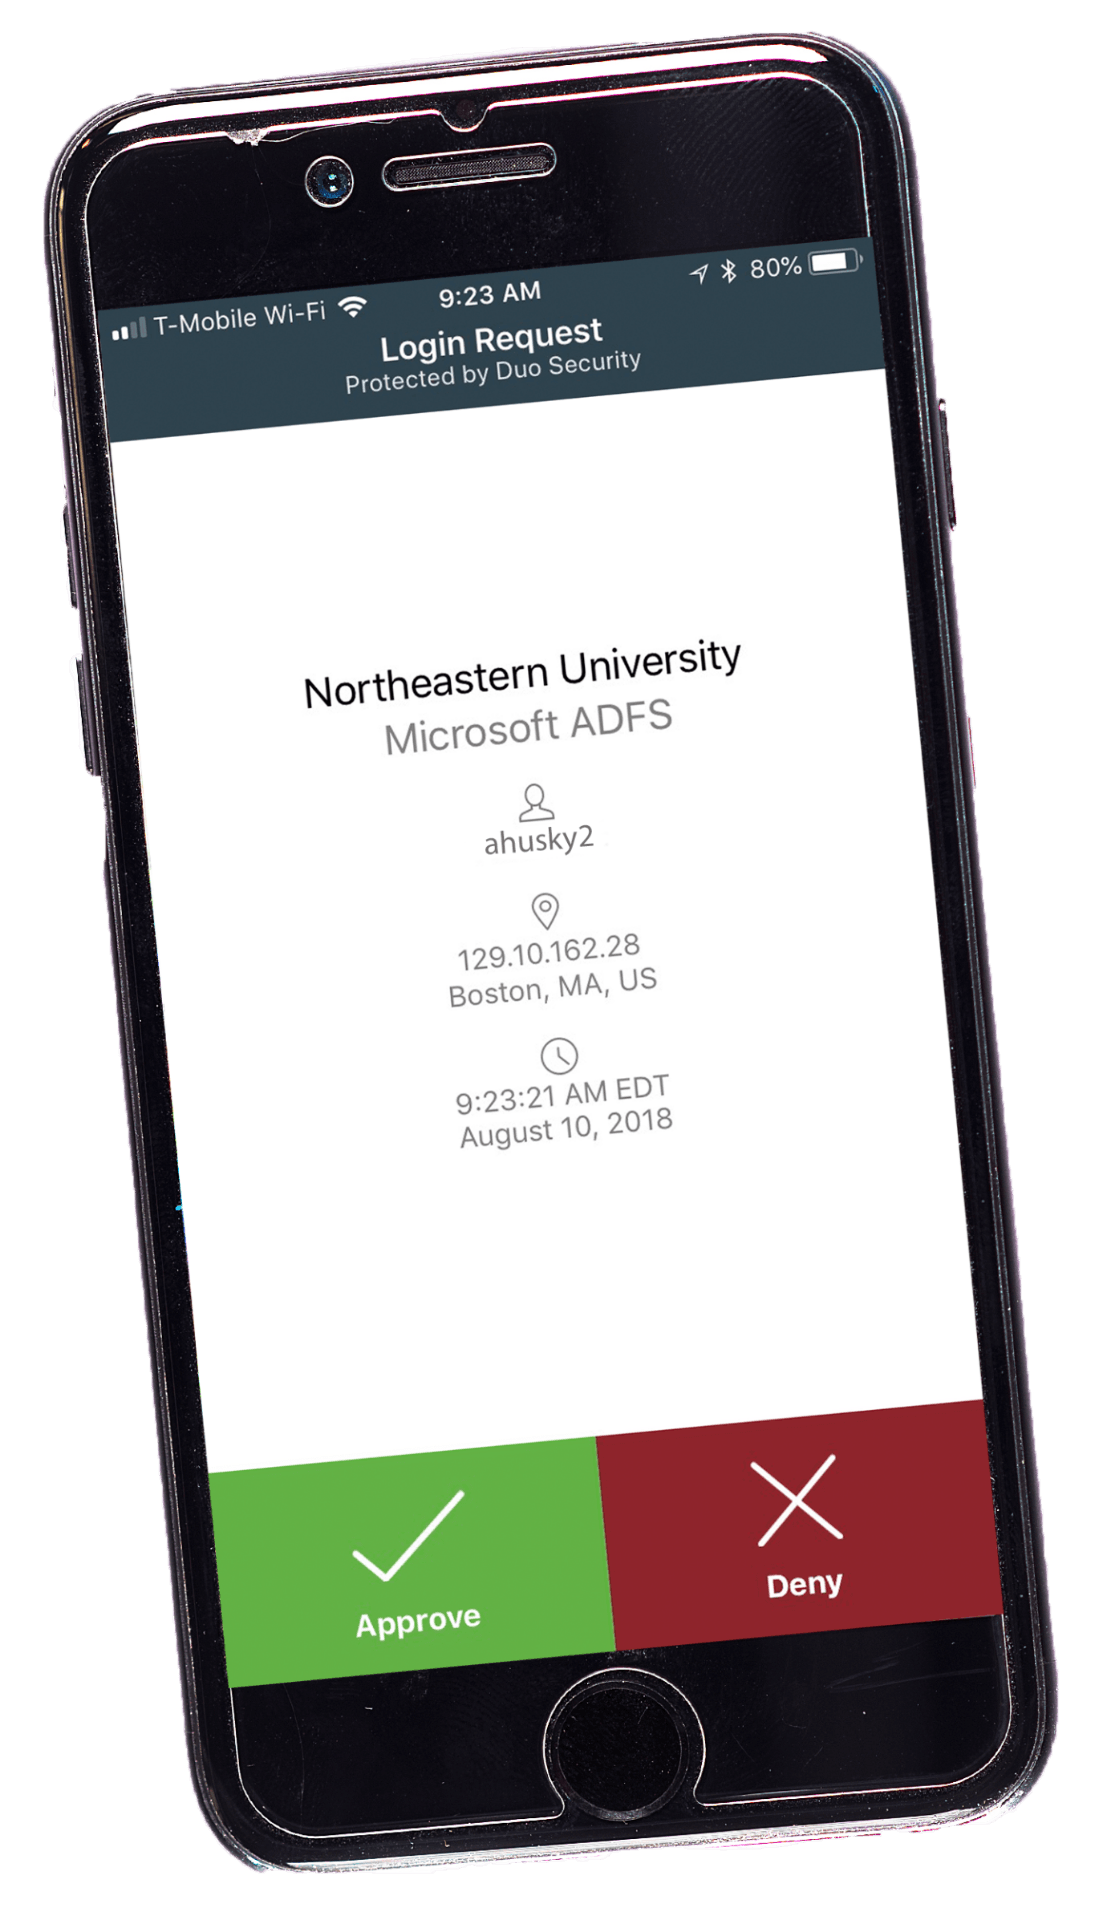
Office 365 services will be among the services that will begin requiring 2FA as of May 14, 2019. Users must have Office 2016 or higher in order for 2FA to work for Outlook email (ITS recommends Office 2019). If you are currently running an older version of Office, please upgrade before May 14. Please check your version of Office prior to beginning the upgrade process. This page offers step-by-step instructions for upgrading and/or installing Office on the following devices:
- Not managed or owned by Northeastern
- PCs managed by Northeastern
- Macs managed by Northeastern
How do I install or upgrade Office on a computer not managed by Northeastern?
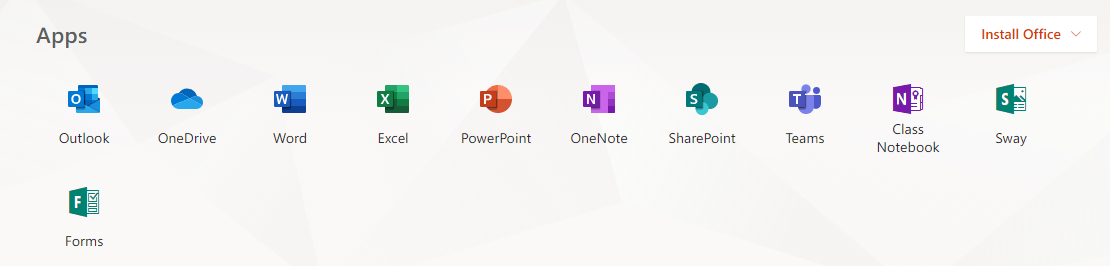
You can access and download the Office apps by signing into your Office 365 online portal.
Step 1
Go to office.com.
Step 2
Step 3
Step 4
Step 5
On the next screen, look for a list of the available applications and an “Install Office” button. Click the button and select “Office 365 apps.”
Step 6
Click the Setup file at the bottom of the screen to run the installer. You will get a pop up window that asks you if you want to allow the app to make changes to your device. Click Yes.
Step 7
After installation, start Office and sign in using your Office 365 login credentials: myNortheasternUsername@northeastern.edu and the password you use for logging into the myNortheastern portal.
How do I install or upgrade Office on a Northeastern-managed PC?
Note: Before beginning this installation, make sure you have saved all your work and closed all open Microsoft applications, including applications that come with older versions of Office, such as Skype for Business.
Step 1
Step 2

Step 3
Check the box next to the Microsoft Office 365 software to install on your computer, then click Install Selected. If you do not see Microsoft Office 365 listed, please contact the ITS Service Desk at 617.373.4357.
Step 4
The Microsoft Office 365 software will begin to download and install.
Note: The installation process will uninstall previous versions of Microsoft Office. Please do not open any Microsoft Office applications until the removal and install process is complete.
Step 5
After the installation completes, open any of the Office applications and accept the License Agreement.
How do I install or upgrade Office on a Northeastern-managed Mac?
Step 1
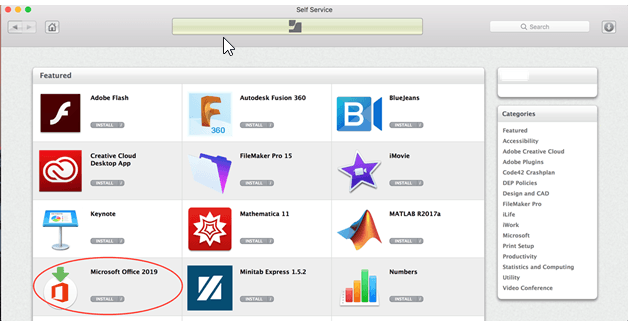
Step 2
Step 3
Step 4
Need Some Help?
Beginning spring 2019, all Northeastern University users with faculty, staff, or sponsored accounts will be required to enroll in 2FA. These community members should expect to use 2FA to log in to an increasing number of the university’s most frequently used online services and systems.
Check out the Commonly Asked Questions page for additional questions and answers regarding the university’s 2FA requirement.